文章更新紀錄:
- 2023.11.11 發佈
- 2023.11.12 更新內容
前言
在介紹 CI 持續整合的觀念時,我經常會分享一句話「沒有自動化測試,不要說你是在做 CI」。在 CI Pipeline 中,我們會設置各種自動化測試的 CI Job,讓 CI Pipeline 不只是實踐自動化,而是能成為一位守護「最低限度品質」的守門員。
既然自動化測試是 CI Pipeline 的重要關鍵,理所當然 CI 工具與測試工具兩者就會有各種互相合作與整合的狀況出現啦!
在這篇文章,我們就從大家最常聽見的測試 Unit test 為主題,介紹如何在 GitLab CI Pipeline 中執行自動化單元測試。
操作步驟
1. 準備你要測試的程式碼與 Unit test
想要執行 Unit test,首先當然你需要一份程式碼,然後為你的程式碼撰寫對應的 Unit test 啦!
但本文重點不是程式開發與怎麼寫測試,所以這部分就請容我跳過,就讓我直接在 GitHub 上隨意搜尋,挑選兩種不同程式語言的 Unit test example 作為範例。
首先是 Python,可以找到這個範例 ptracesecurity/pytest-example
接著是 PHP,可以找到這個範例 php-actions/example-phpunit
2. 規劃你的 CI Job 與執行環境
因為本文我們只針對 Unit test 這件事,因此就先省略不談整條 CI Pipeline 的規劃,直接切入單一 CI Job 的規劃。
如同我在其他文章或我的著作中曾提過的,我們在規劃 CI Job 時,我們需要思考一個關鍵的問題!
你的 CI Job 需要什麼樣的環境,才能正常的運行?
對應到今天的主題 Unit test,即是什麼樣的環境可以順利執行 Unit test?
再繼續對應到上面的兩份範例程式,第一份範例是 Python,那我會需要能執行 pytest 的環境;第二份範例是 PHP,那我需要能執行 phpunit 的環境。
但環境需求只有這麼簡單嗎?進一步追問,是哪一個版本的 Python?任何版本的 pytest 都可以嗎?同理 PHP 也會有類似的需求。
根據前面的範例程式,最終可以確定我需要準備下面兩種測試環境。
- Python
3.8+ pytest7.4的環境 - PHP
^8.1+ phpunit^9.5的環境
確定了基本環境需求,下一步我們要思考的即是「如何滿足這些環境需求?」而這個問題就會開始跟你的 GitLab CI Runner 扯上關係。
如果你還不認識 Container,也還沒在 CI/CD Pipeline 中運用 Container,那麼你可能會選擇在你的「CI 專用測試機」上安裝特定版本的 Python、pytest 或 PHP、phpunit 以滿足測試環境需求。屆時你在 CI Pipeline 與 CI Job 多半會規劃讓 GitLab Runner 能連上「CI 專用測試機」幫你進行自動化測試。
反之,如果你已經是 Container 的愛用者,這時你可能會考量的是下面兩種方案
- 方案一:讓 GitLab CI Runner 運行乾淨的 Container,接著在 CI Job 中,會有一兩個動作用來將 Container 變成可執行 Unit test 的環境
- 方案二:事先做好可執行 Unit test 的 Container image,讓 GitLab CI Runner 直接使用該 image 來運行一個可執行 Unit test 的環境
讓我們針對上面兩種 Container 方案,各做一個舉例:
方案一,以 Python 為例,在 .gitlab-ci.yml 中 CI Job 多半會撰寫如下內容
pytest:
  stage: test
  # 我指定 Runner 要運行 python 3.12 的 Container
  image: python:3.12
  script:
  # 在執行 pytest 之前,要先安裝 pytest
  - pip3 install pytest
  # 接著才能執行 pytest
  - pytest
方案二,以 Python 為例,在 .gitlab-ci.yml 中 CI Job 可能會撰寫如下內容
pytest:
  stage: test
  # 假設我事先做好了一個已安裝 Python 3.12 + pytest 的 image,直接用它來運行 Container
  image: example/pytest:python3.12
  script:
  # 因此這裡可以直接執行 pytest
  - pytest
如果你最後打算在 GitLab CI Pipeloine 中使用 Container,記得要準備 Executor 為 Docker 或 Kubernetes 的 GitLab Runner,關於 Runner 與 Executor 的關係,可以看我的舊文章《GitLab CI 之 Runner 的 Executor 該如何選擇?》這裡就不重複說明啦。
3. 讓 Unit test 產出 Test Report
前面我們有介紹了兩種 Container 方案,這裡我以方案一為基礎,繼續說明下去。
搞定了執行 CI Job 的環境,如此一來就能順利讓 CI Pipeline 能自動執行單元測試了,但這樣就足夠了嗎?難道不用將每次跑完測試的結果,輸出為 Report,以便後續運用嗎?
因此這一步我們要讓 Unit test 將測試的結果產出為 Test report。
話不多說,直接上 .gitlab-ci.yml 範例,首先是 Python。
pytest:
  stage: test
  image: python:3.12
  script:
  # 安裝 Python 的測試工具 pytest
  - pip3 install pytest
  # 執行 pytest 同時加上參數,產出 Unit test report
  - pytest --junitxml=test-report.xml
接著是 PHP 範例
phpunit:
  stage: test
  # 因為 PHP 不像 Python 會直接預裝好套件管理工具 pip3。
  # 這裡假設我事先準備了一個有裝好 Composer 的 docker image
  image: example/php-composer:8.1
  script:
  # 用 composer 安裝 PHP 的測試工具 phpunit
  - composer require phpunit/phpunit
  # 執行 phpunit,並產出 Report
  - php ./vendor/bin/phpunit --log-junit test-report.xml
4. 將 Test Report 內容直接整合在 GitLab CI Pipeline 的介面
上一步讓我們順利產出 Test Report,但我們似乎並沒有將它歸檔到某個地方,這樣我們依然無法進一步的運用它。
讓我們繼續對 CI Job 做些修改,不僅讓 GitLab CI 可以將 Report 歸檔在 GitLab CI 的 Artifacts 功能中,還能根據 Test Report 的內容,將資訊直接顯示在 CI Pipeline 的介面上,這樣我們只要在 GitLab 的介面上就能直接閱讀測試報告的內容,超方便的啦!
Python 範例
pytest:
  stage: test
  image: python:3.12
  script:
  - pip3 install pytest
  - pytest --junitxml=pytest.xml
  # 將 Report 上傳到 GitLab CI 的 Artifacts 功能
  artifacts:
    # 告知 GitLab CI 這個 Artifact 是 Test Report
    reports:
      junit: test-report.xml
PHP 範例
phpunit:
  stage: test
  # 繼續假設我有事先準備了裝好 PHP 與 Composer 的 docker image
  image: example/php-composer:8.1
  script:
  - composer require phpunit/phpunit
  - php ./vendor/bin/phpunit --log-junit test-report.xml
  # 將 Report 上傳到 GitLab CI 的 Artifacts 功能
  artifacts:
    # 告知 GitLab CI 這個 Artifact 是 Test Report
    reports:
      junit: test-report.xml
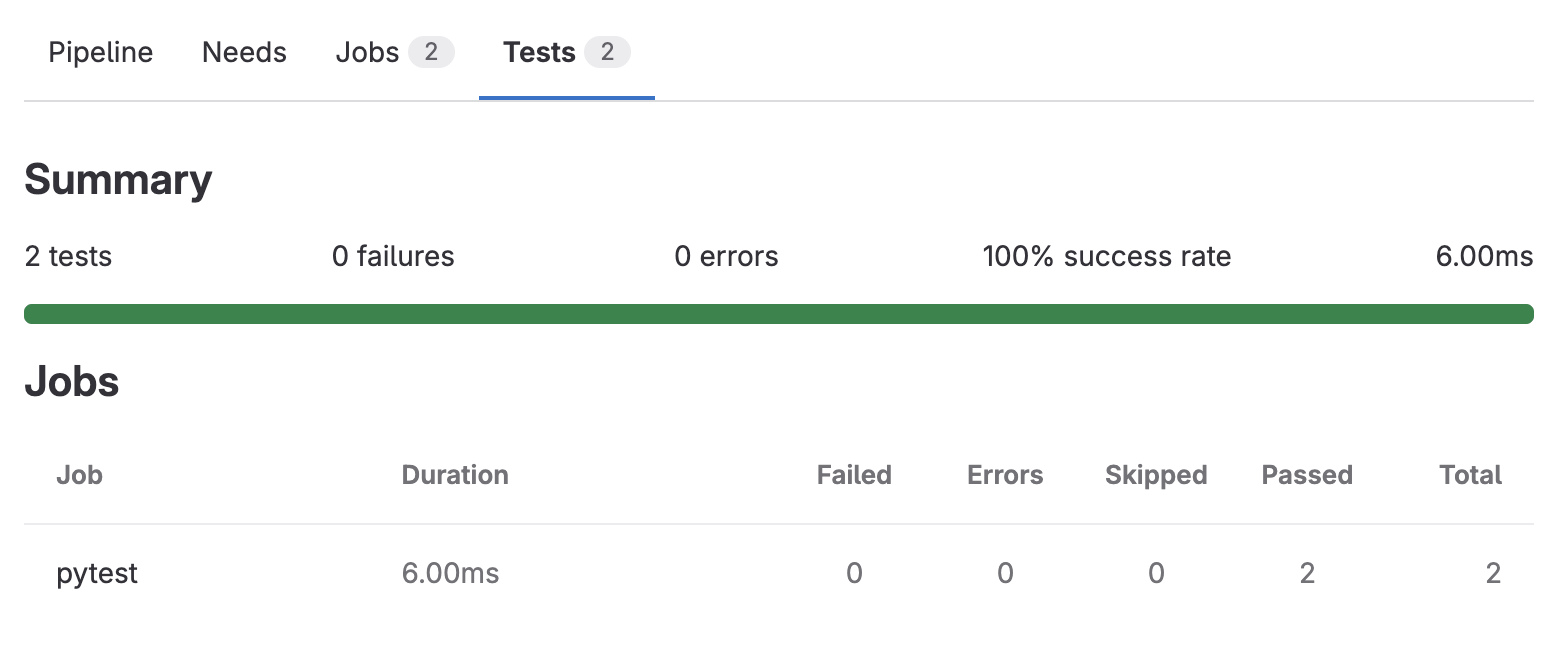
按著上面的步驟,最後就能做出類似下面圖片的成果。
在 CI Pipeline 的介面上,會出現 Test 的頁籤,其中可以直接瀏覽 Unit test 的結果。
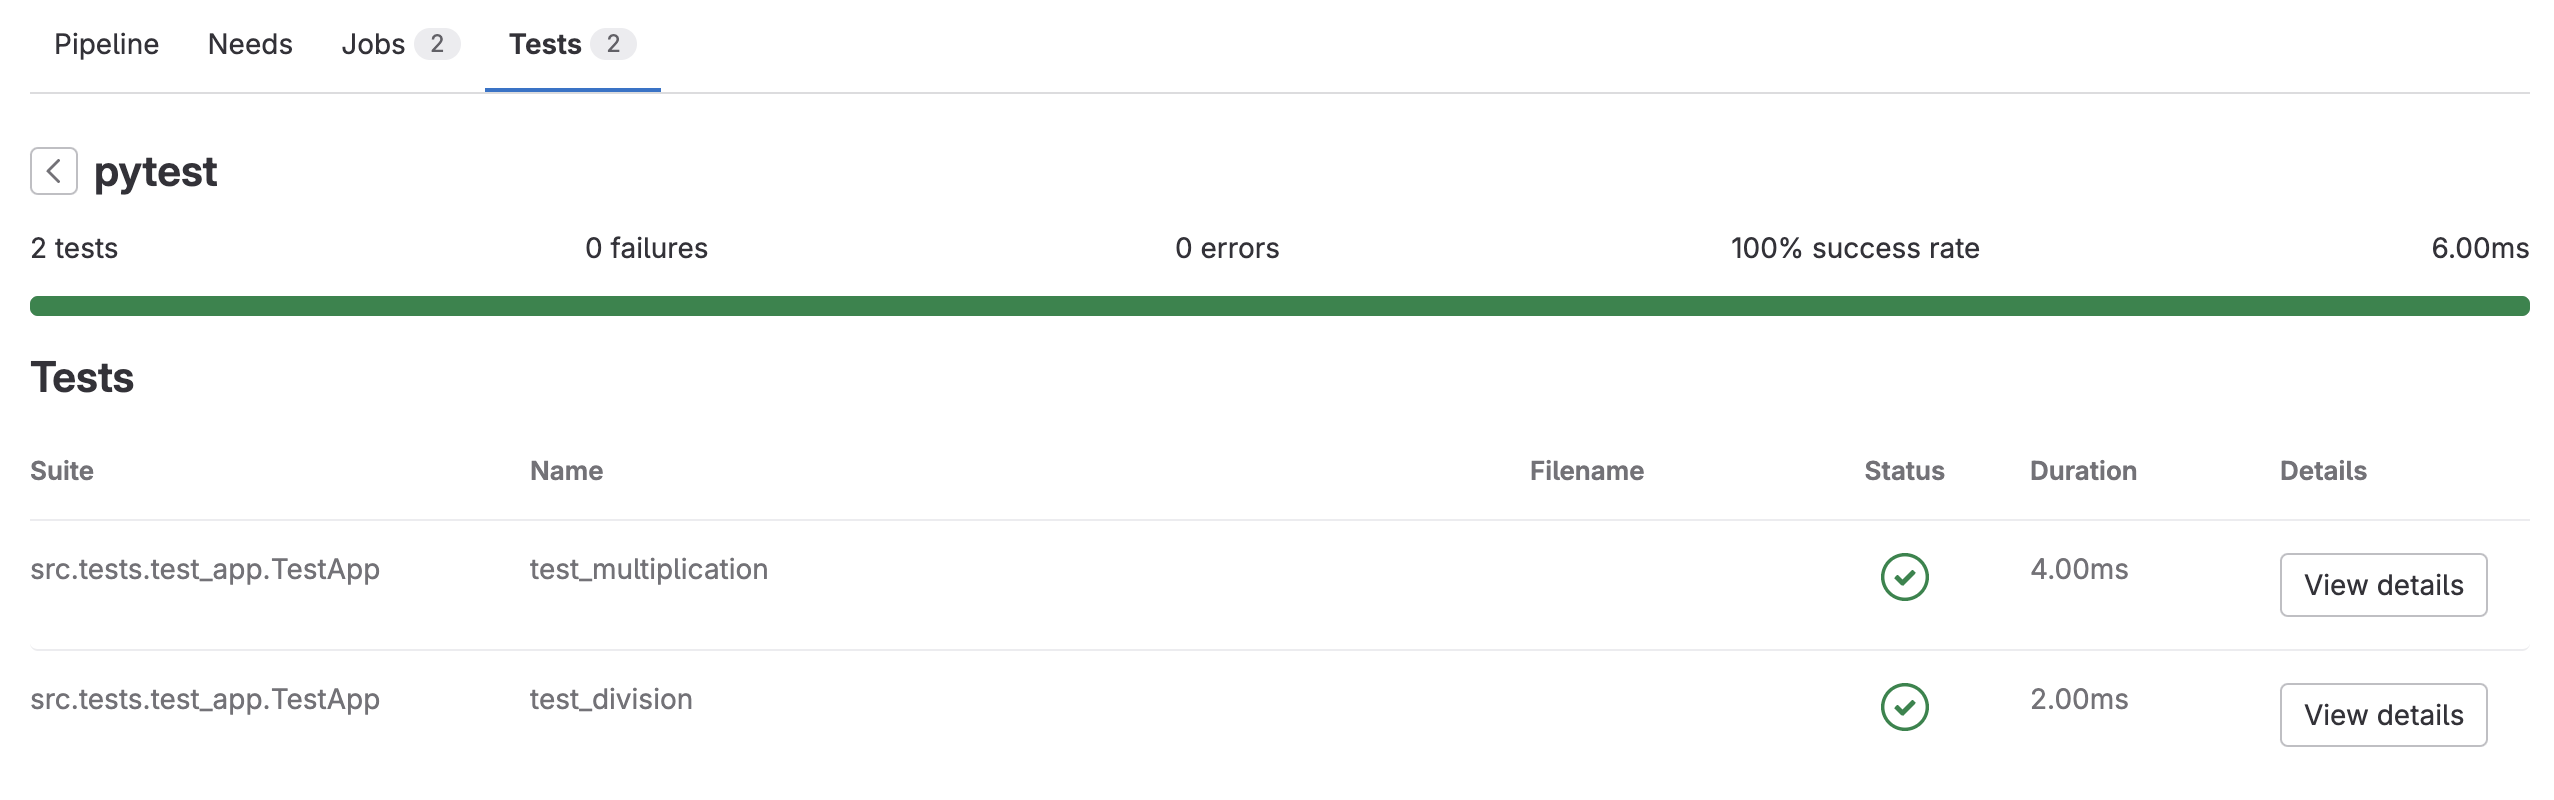
繼續點擊其中的項目,可以看到更多的內容。
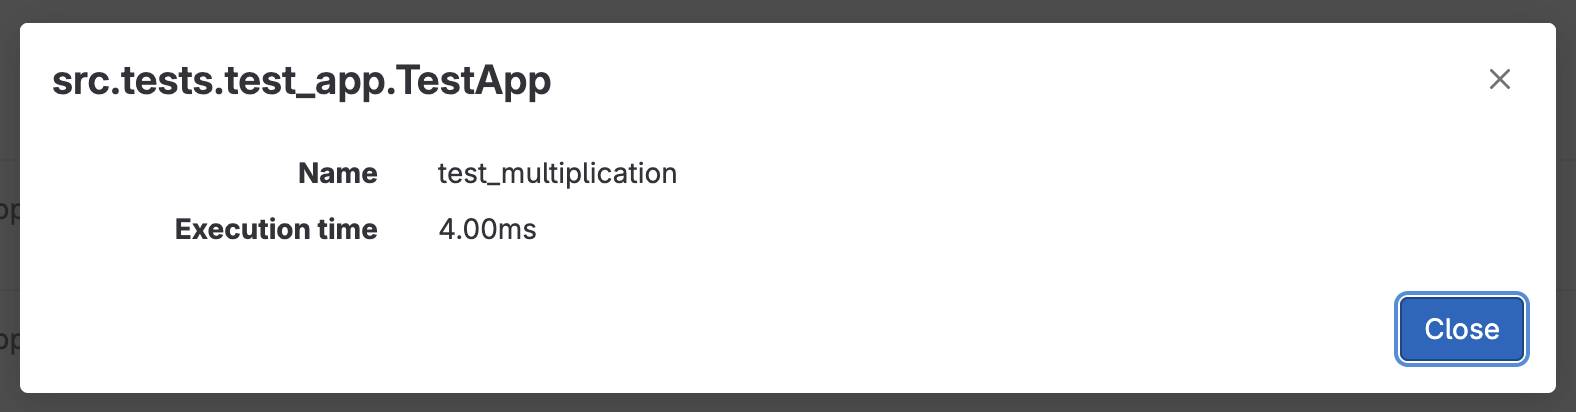
按下 View details 會顯示更多資訊。
在上面我們主要是新增了 GitLab CI 的 Keyword artifacts:reports:junit,這是一個專門用來整合 JUnit XML 格式之 Test Report 的功能。特別強調一下,它只能接受 JUnit XML 格式,這也就是為何前面在讓 Unit test tool 產出 report 時,我使用的是 --junitxml 與 --log-junit 這樣的參數。
5. 讓 Unit test 產出 Test Coverage Report
Unit test tool 除了可以產出 Test report,通常也能一併產出測試覆蓋率報告(Test Coverage Report),所以在這一步我們繼續修改 .gitlab-ci.yml,讓 CI Job 一次會產出兩種 Report。
Python 範例
pytest:
  stage: test
  image: python:3.12
  script:
  # 不只是 pytest,還需要能產出 Test coverage 的套件 pytest-cov
  - pip3 install pytest pytest-cov
  # 執行 pytest 同時要加上更多參數,產出我們需要的兩種 Reports
  - pytest --junitxml=test-report.xml --cov --cov-report term --cov-report xml:coverage.xml
  artifacts:
    reports:
      junit: test-report.xml
PHP 範例
phpunit:
  stage: test
  # 繼續假設我有事先準備了裝好 PHP 與 Composer 的 docker image
  image: example/php-composer:8.1
  script:
  # 不只要安裝 phpunit,也要安裝能產出 Test coverage 的套件 phpunit/php-code-coverage
  - composer require phpunit/phpunit phpunit/php-code-coverage

  # 有了 php-code-coverage 還不夠,你還需要 xdebug
  - pecl install xdebug

  ## 而且還要額外設定 xdebug 用來支援產出 Test coverage
  ## 是不是覺得有點麻煩?
  ## 所以如果能事先準備一個專門跑測試的 docker image,是會比較方便一些
  - export XDEBUG_MODE=coverage

  # 執行 phpunit,同時產出兩種 Reports
  - php ./vendor/bin/phpunit --log-junit test-report.xml --coverage-text --coverage-cobertura=coverage.xml
  artifacts:
    reports:
      junit: test-report.xml
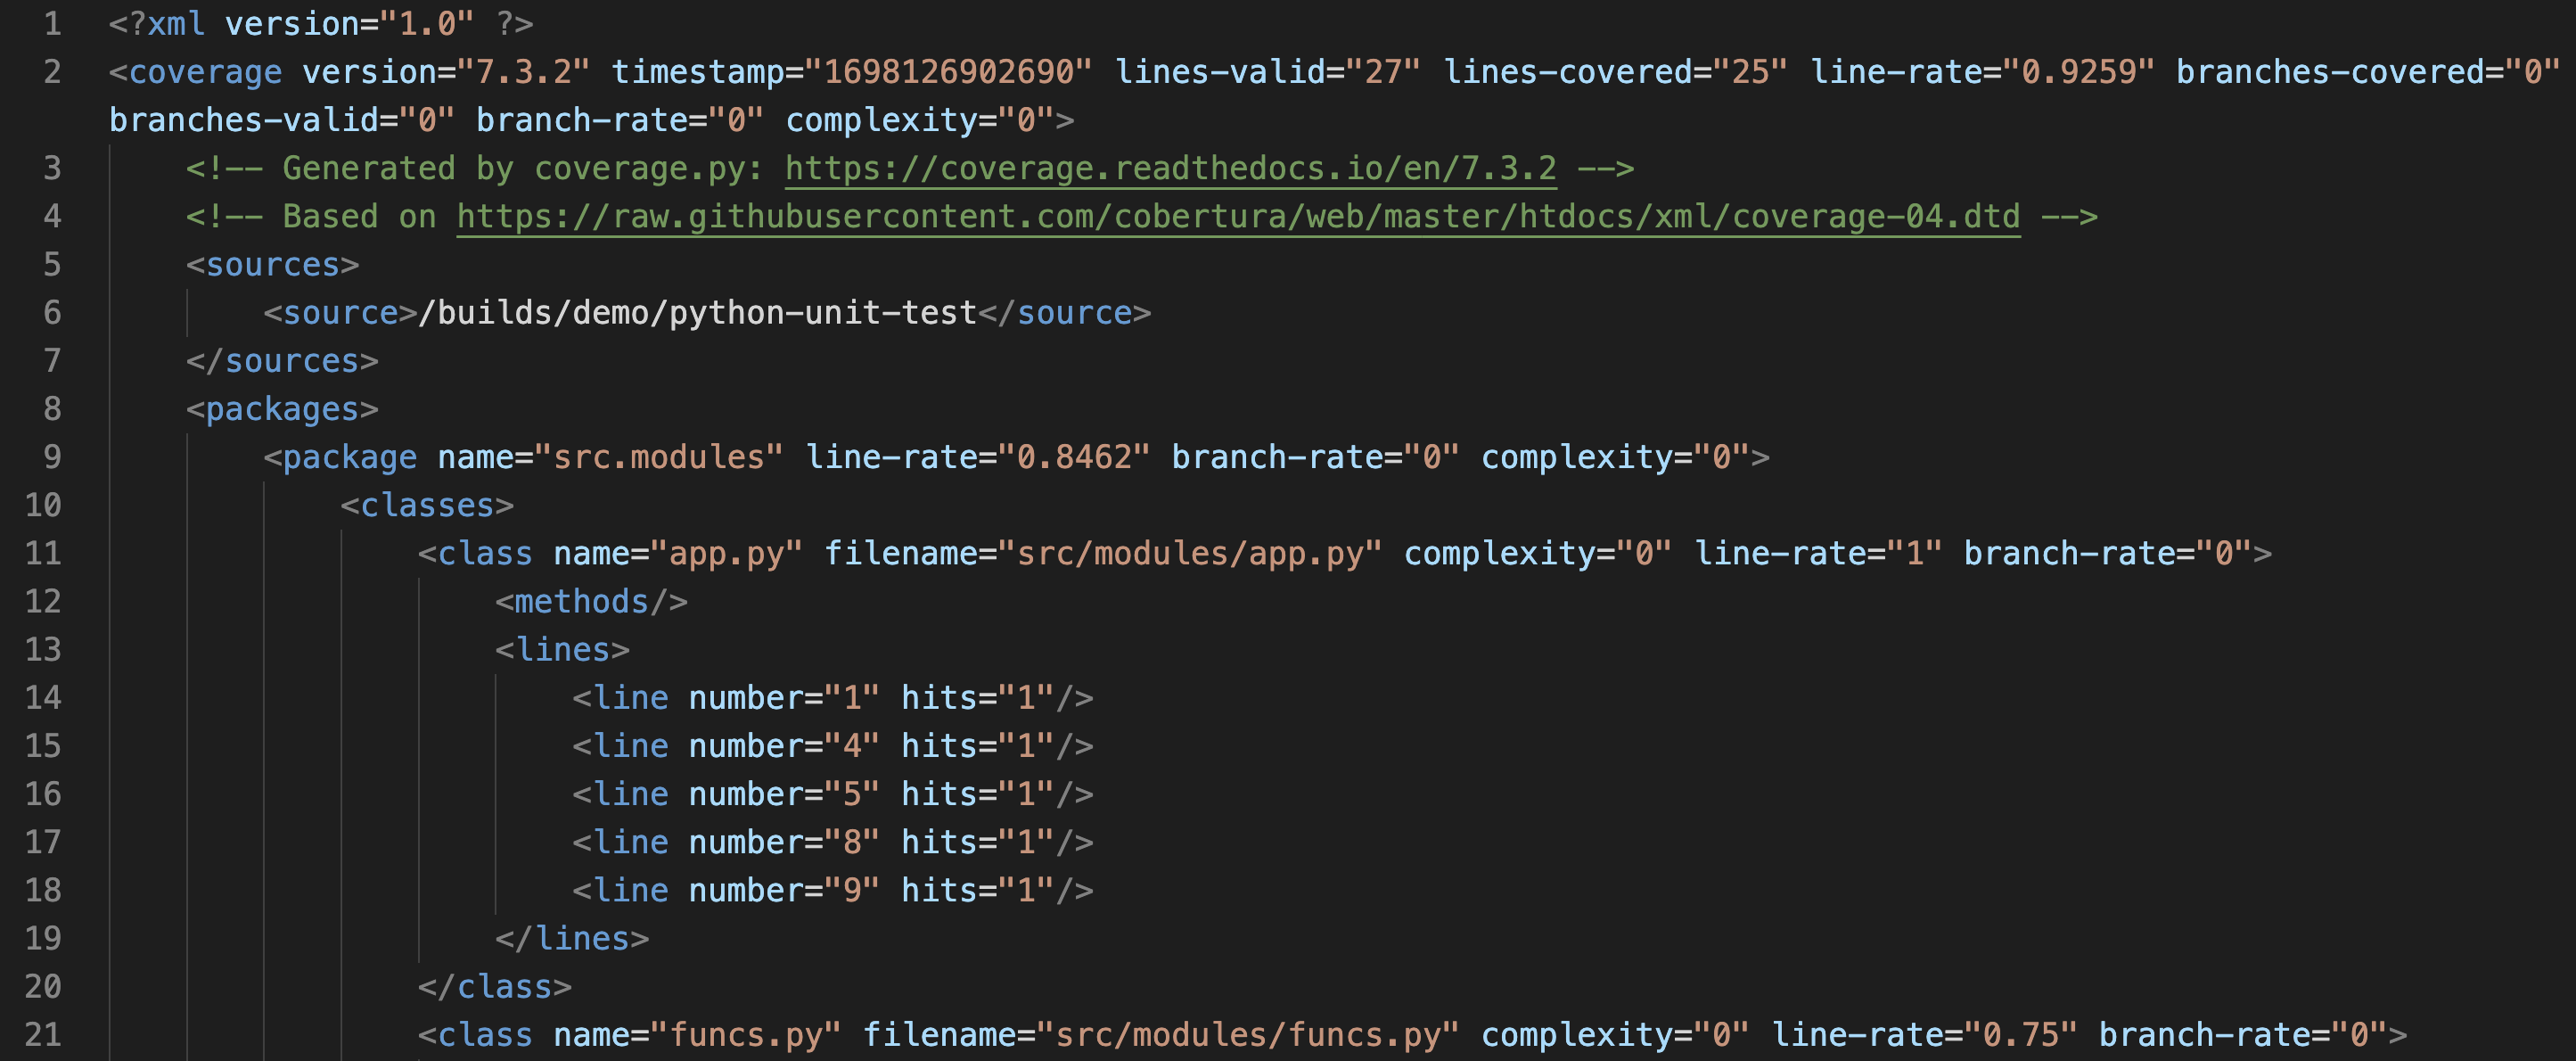
如此一來,pytest 就會產出類似下面內容的 Test Coverage Report
6. 將 Test Coverage 的數字,直接整合在 GitLab CI Pipeline 的介面
跟前面的步驟一樣,如果只是產出 Report 對我們來說並沒有任何意義,我們一樣需要將它歸檔,才方便後續能解讀 Report 內容。
本文最後一次修改 .gitlab-ci.yml,我們一樣要讓 GitLab CI 會將 Test coverage report 歸檔至 Artifacts 功能,同時也自動讀取 Report 內容,將測試覆蓋率的數字直接顯示在 CI Pipeline 的介面上。
Python 範例
pytest:
  stage: test
  image: python:3.12
  script:
  - pip3 install pytest pytest-cov
  - pytest --junitxml=test-report.xml --cov --cov-report term --cov-report xml:coverage.xml
  artifacts:
    reports:
      junit: test-report.xml
      # 在 artifacts:reports 中,多加另一種 report
      coverage_report:
        coverage_format: cobertura
        path: coverage.xml
PHP 範例
phpunit:
  stage: test
  # 繼續假設我有事先準備了裝好 PHP 與 Composer 的 docker image
  image: example/php-composer:8.1
  script:
  - composer require phpunit/phpunit phpunit/php-code-coverage
  - pecl install xdebug
  - export XDEBUG_MODE=coverage
  - php ./vendor/bin/phpunit --log-junit test-report.xml --coverage-text --coverage-cobertura=coverage.xml
  artifacts:
    reports:
      junit: test-report.xml
      # 在 artifacts:reports 中,多加另一種 report
      coverage_report:
        coverage_format: cobertura
        path: coverage.xml
按著上面的設定,在 CI Pipeline 的 Job 頁籤,就會直接顯示測試覆蓋率的數字。

小結
在本文中,我們介紹了在 GitLab CI Pipeline 中執行自動化單元測試的方法。如果你本身有在寫 Unit test,那麼你應該會覺得一點都不難,因為前文重點中的「如何準備一個可以執行測試的環境」與「如何產出所需的 Reports」你應該都在自己的 Local 環境中處理過,唯一的差別只是如何將它們放進 CI Pipeline 的環境。
要特別提醒大家的是目前在 GitLab CI 中,是以 Keyword artifacts:reports:junit 來接收 JUnit 格式 的 Unit Test Report。顧名思義它只接受 JUnit XML 格式的 Report 可以直接整合到 CI Pipeline 的介面,因此如果不幸你的 Unit test tool 無法產出 JUnit XML 格式,那恐怕你就要另外找方法做格式上的轉換了。
至於 Test Coverage Report,GitLab 目前預設接受 Cobertura XML 格式,因此同樣如果你的 Coverage Report 並非此種格式,也要另外想辦法嘍!
最後,實際上要能順利執行 Unit test,不論是 Python 的 pytest 或 PHP 的 phpunit 各自都有自己的 Config 需要另外設定,這部分的內容也是本文沒有特別說明的地方,還請自行閱讀各種 Unit test tools 的教學文件喔。
本文另外一個重點是方案一與方案二兩種 CI 專用的 Container。我個人的建議是在剛開始規劃與撰寫 CI Pipeline 時,你可以先用方案一作為起步,但隨著該程式碼所需的 CI Pipeline 越來越具體與定案後,就可以開始逐步改為方案二。畢竟隨著 CI Pipeline 頻繁執行時,如果每一次 CI Job 都要花費時間與網路頻寬去安裝固定會使用的 package 或 tool,累積起來也是一筆不容小覷的浪費。
本文就到此結束啦,希望大家都能開始在 CI Pipeline 中,添加必要的自動化測試,讓 CI Tool 能真正發揮它的功用!